Engineer App guides
Engineer App · Inspections
Logging defects
Last updated 17 Aug 2026
A defect is DoorTRACE's record of something wrong with a fire door: a damaged leaf, a missing seal, a faulty closer. You don't fill in a separate defect form. Every checklist item you mark as Fail during an inspection automatically becomes a defect on the door when you submit, complete with your photo and note. This guide covers what a failed item needs from you, how to check your defects before submitting, and what happens to them afterwards.
Before you start
Defects are logged from inside an inspection, so you'll need to be running one: see Running an initial inspection or Running a scheduled inspection for how to start. Like the rest of the inspection flow, logging defects works offline: the defect is created when the inspection syncs.
Fail the item
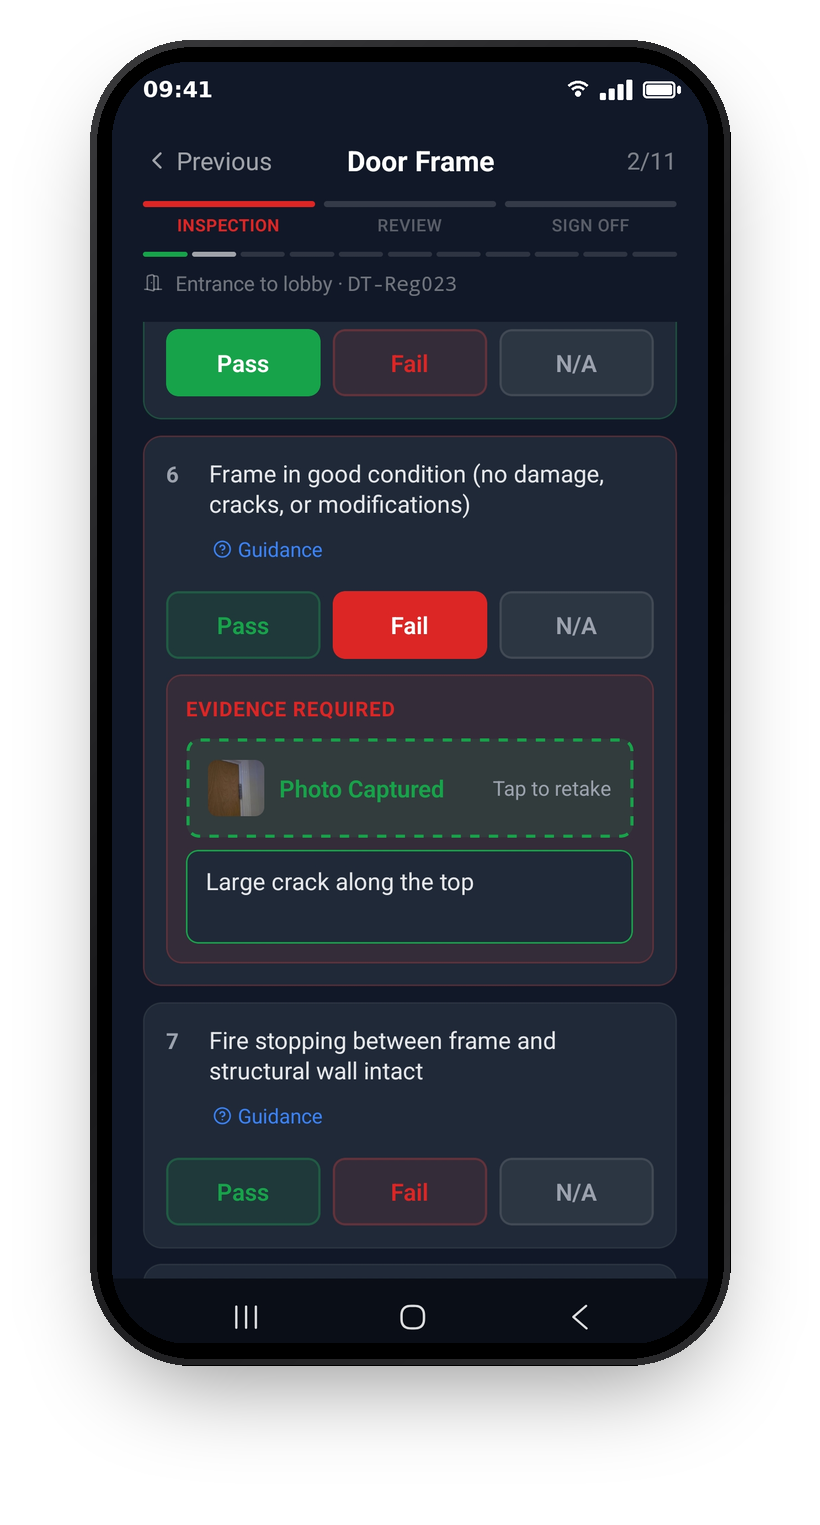
When you tap Fail on a checklist item, an Evidence Required panel opens underneath it asking for two things: a photo, via Take Photo, and a note, in the box that says "Describe the issue...". Both are mandatory. Until you've provided them, the item shows "Photo and note required for all failed items" and the Continue button at the bottom of the page stays disabled. The two gap measurement items work slightly differently: they always need a value in millimetres and a photo whatever the result, and the note becomes required as well when you fail them.
Tip: if you've answered every item on the page but Continue is still greyed out, look for the orange "Evidence missing" banner at the bottom: a failed item somewhere on the page is missing its photo or note.
Write a note worth reading
Your note becomes the defect's description, word for word. It's what the person scheduling the remedial work reads to decide what needs doing, so say what's wrong, where it is on the door, and how bad it is. "Large crack along the top" tells them far more than "damaged". The photo should back the note up: get close enough that the problem is obvious, and include enough of the door that they can see where it is.
Check your defects at Review
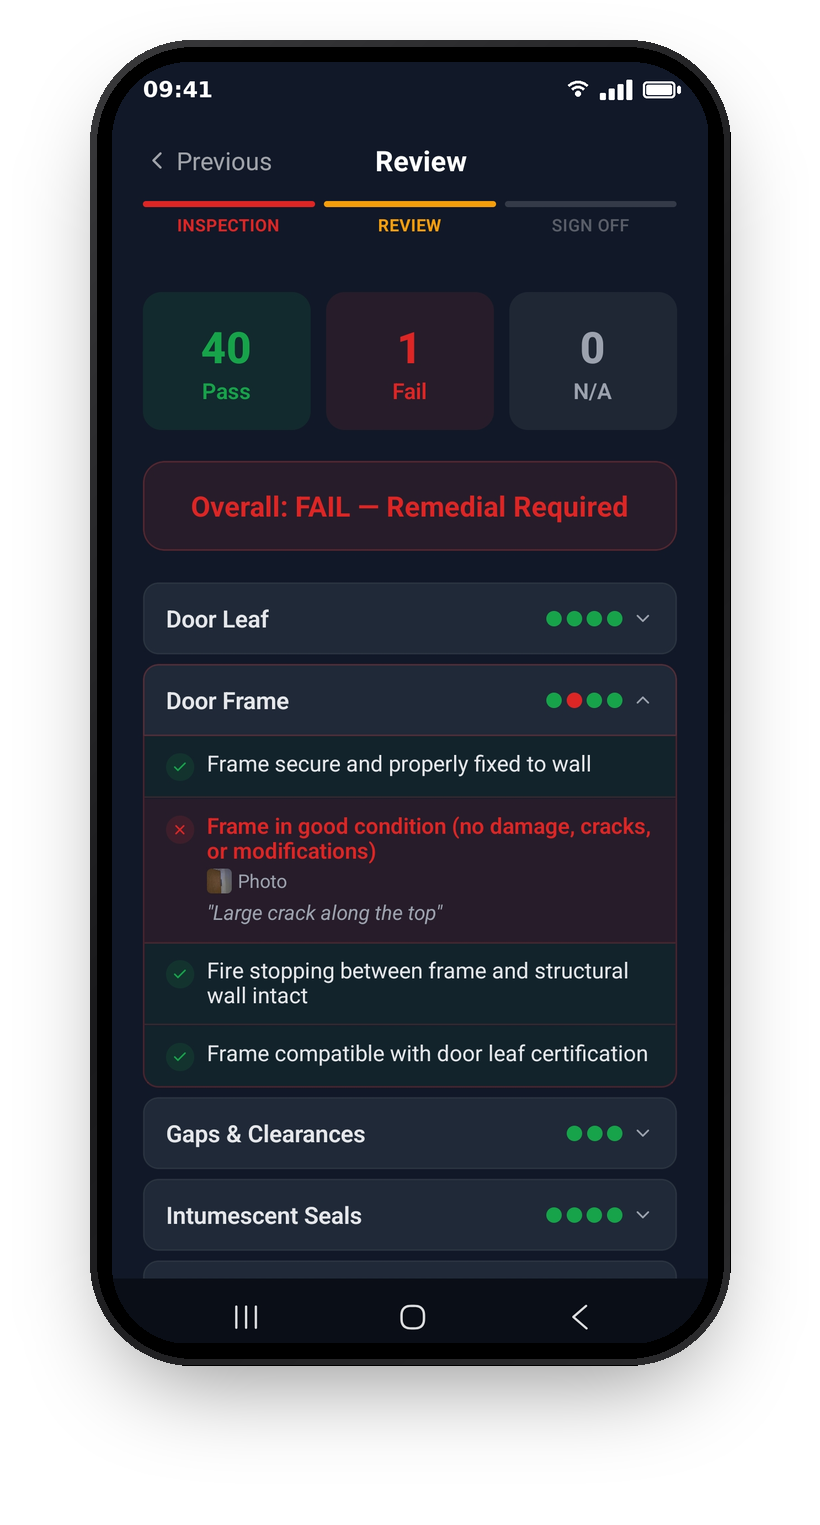
The Review step is your last chance to check the defects before they're created. The Fail card at the top counts your failed items, and the overall result shows "Overall: FAIL - Remedial Required". Categories containing failures are outlined in red with red dots: expand one and each failed item shows in red with your note in quotes and a Photo marker underneath. If a note doesn't read right, or you failed the wrong item, go back with Previous and fix it now. Nothing is saved until you tap Submit Inspection at the Sign Off step.
What happens after you submit
Each failed item becomes exactly one defect on the door. The defect carries your note as its description, your photo as its evidence, a defect type worked out from the checklist category (a failed Hinges item becomes a hinge defect, a failed Signage item a signage defect, and so on), and a medium priority for the company to triage. The door itself is flagged as requiring action, and its record shows the open defects ready for the company to schedule remedial work.
Defects stay open until the fix is signed off
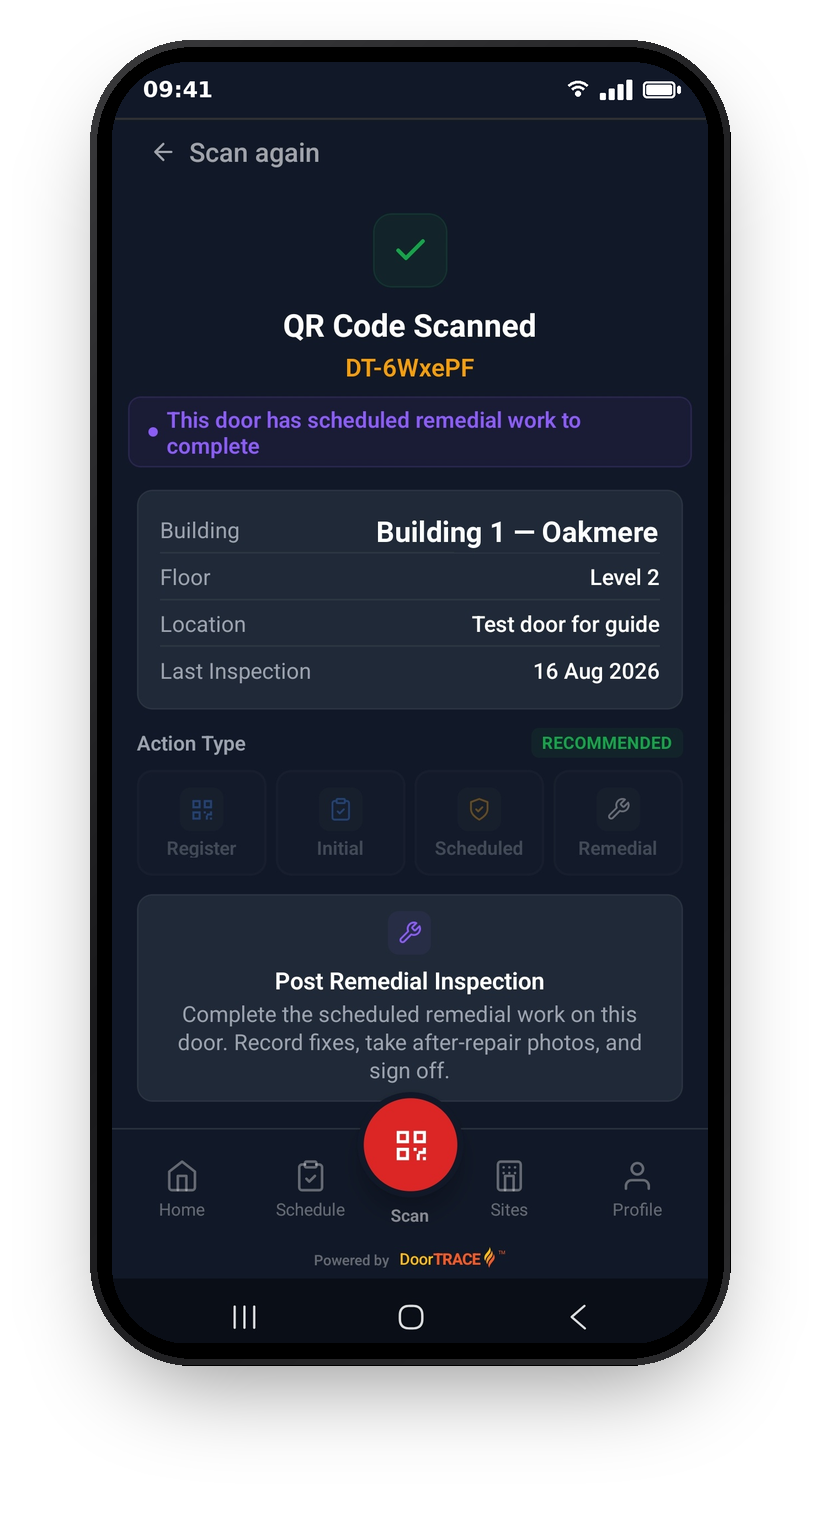
A defect is not resolved by time passing or by the door passing its next inspection. If a later inspection passes while defects are still open, the door stays flagged as requiring action. The only thing that closes a defect is a completed post-remedial form, signed off after the fix is done. In the meantime, scanning the door suggests Remedial as the next action.
You can't jump straight into the fix, though. The Remedial option stays locked until the work has been scheduled in the portal: tap it before then and the app explains that the remedial work hasn't been scheduled yet. That's deliberate. It means work only starts once it's been agreed and assigned, rather than on the spot at the door.
What's next
When you're sent back to fix what you found, see Completing remedial work for how the post-remedial form works.
Still can't find the answer?
Send us a message and we'll help. We respond within one working day.