Engineer App guides
Engineer App · QR tags and doors
Registering a door
Last updated 10 Aug 2026
Registering a door is how a brand new QR tag becomes a live door record on the system. You fix the sticker to the door, scan it, and the app walks you through four short steps: where the door is, reference photos, any notes, and a signed confirmation. This guide covers the whole flow, including what happens after you tap the final button.
Before you start
- The door's building must already be on the system - you pick it from a list, you can't create one in the app. If the building is missing, contact the company you're working with.
- Registration needs app access that allows installation work. If your access is set to inspection only, the Register option is greyed out with the message "Your app access is set to inspection only".
Starting a registration
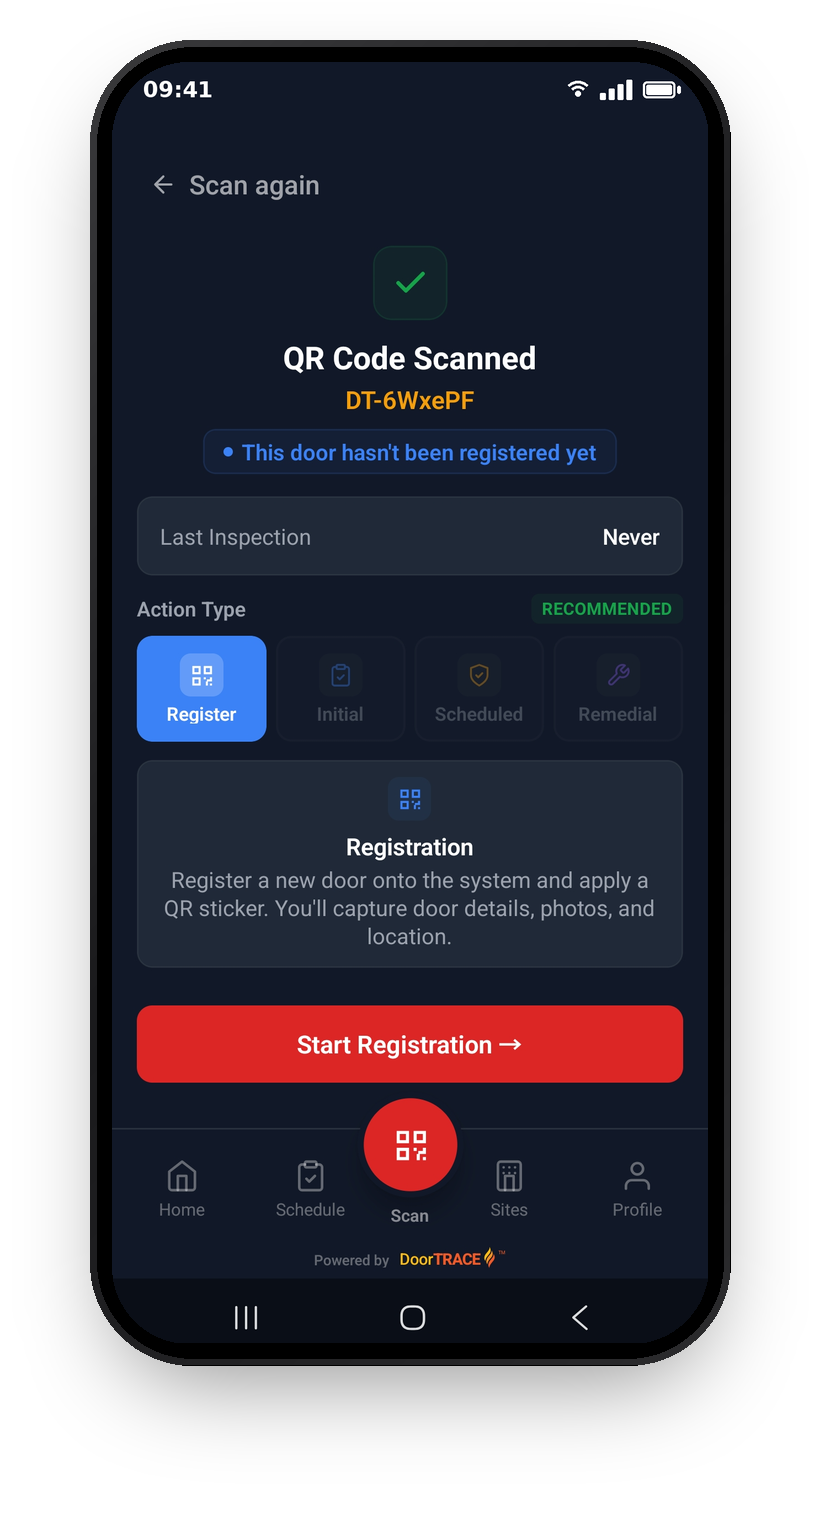
Fix the QR sticker to the door first, then scan it from the Scan tab (the Scanning QR tags guide covers scanning itself). A tag that isn't on a door yet comes up with the badge "This door hasn't been registered yet" and Register pre-selected as the recommended action. Tap Start Registration to begin. The wizard is headed Register Door and shows your progress through the four steps: Location, Photos, Notes, and Confirm. You can go back a step at any time with Previous at the top left without losing anything you've entered.
Step 1 - Location
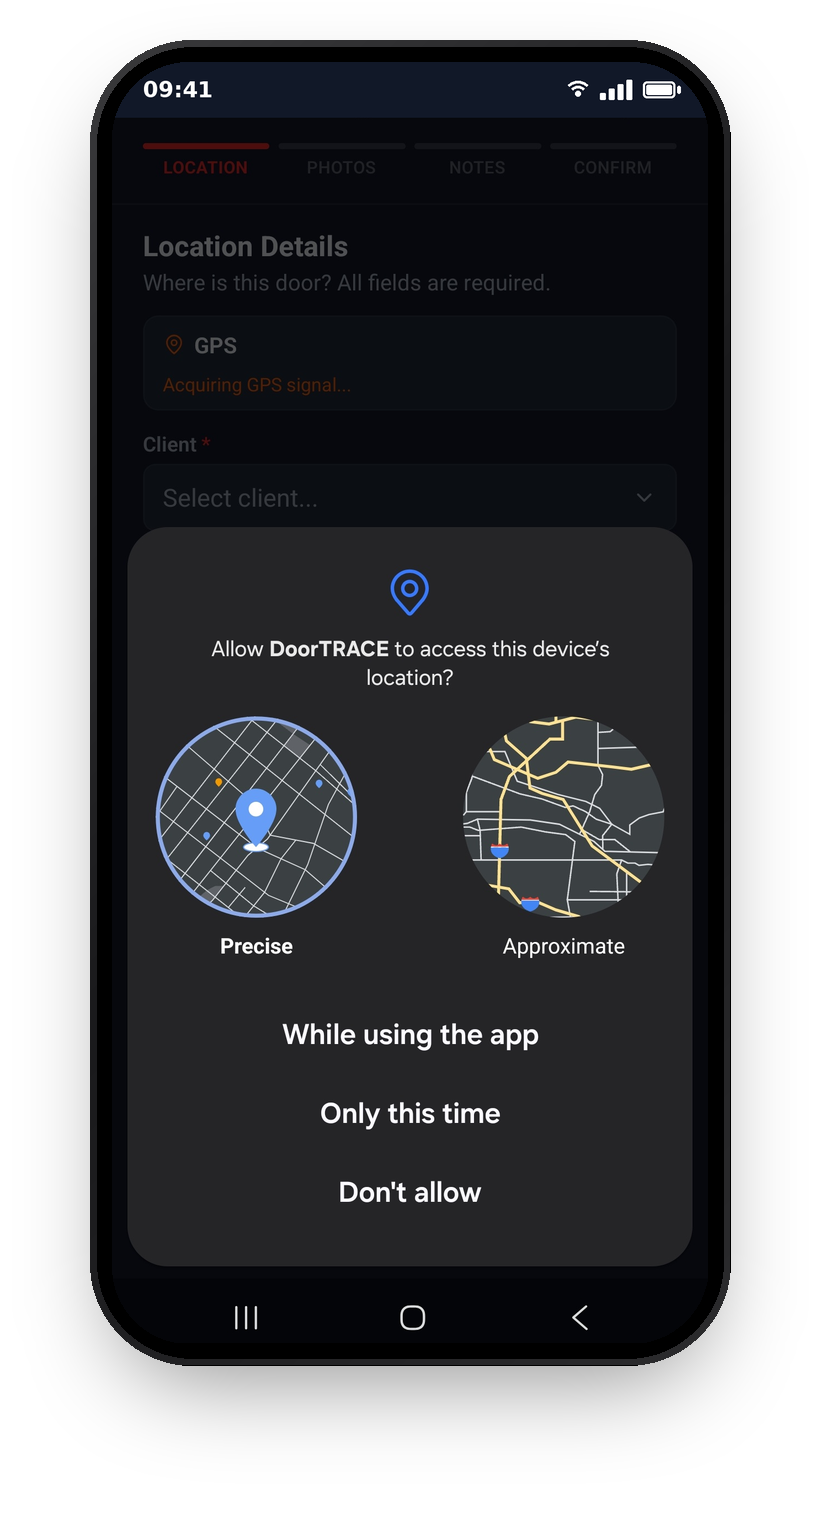
The first time you register a door, the app asks for location access. Allowing it lets the app record GPS coordinates alongside the registration - part of the evidence trail that the door record was created on site. The GPS card at the top of the step shows the signal status, and coordinates are captured silently when you submit. GPS never blocks the form: if location is off, denied, or there's no signal indoors, the registration still saves without it. If you see "Location permission denied. Enable in Settings." you can carry on regardless, or fix the permission and tap Try Again.
Then fill in the four required fields. Client and Building are dropdowns listing the companies and buildings you're linked to - picking a client unlocks its buildings. Floor opens the floor picker (more on that below). Location Description is a short free-text line describing exactly where the door is, like the placeholder example: "Corridor between Flat 12 and Stairwell B". Be specific - this is what everyone after you will use to find the door. Each field's border turns green when it's filled, and Continue unlocks once all four are done.
Picking a floor
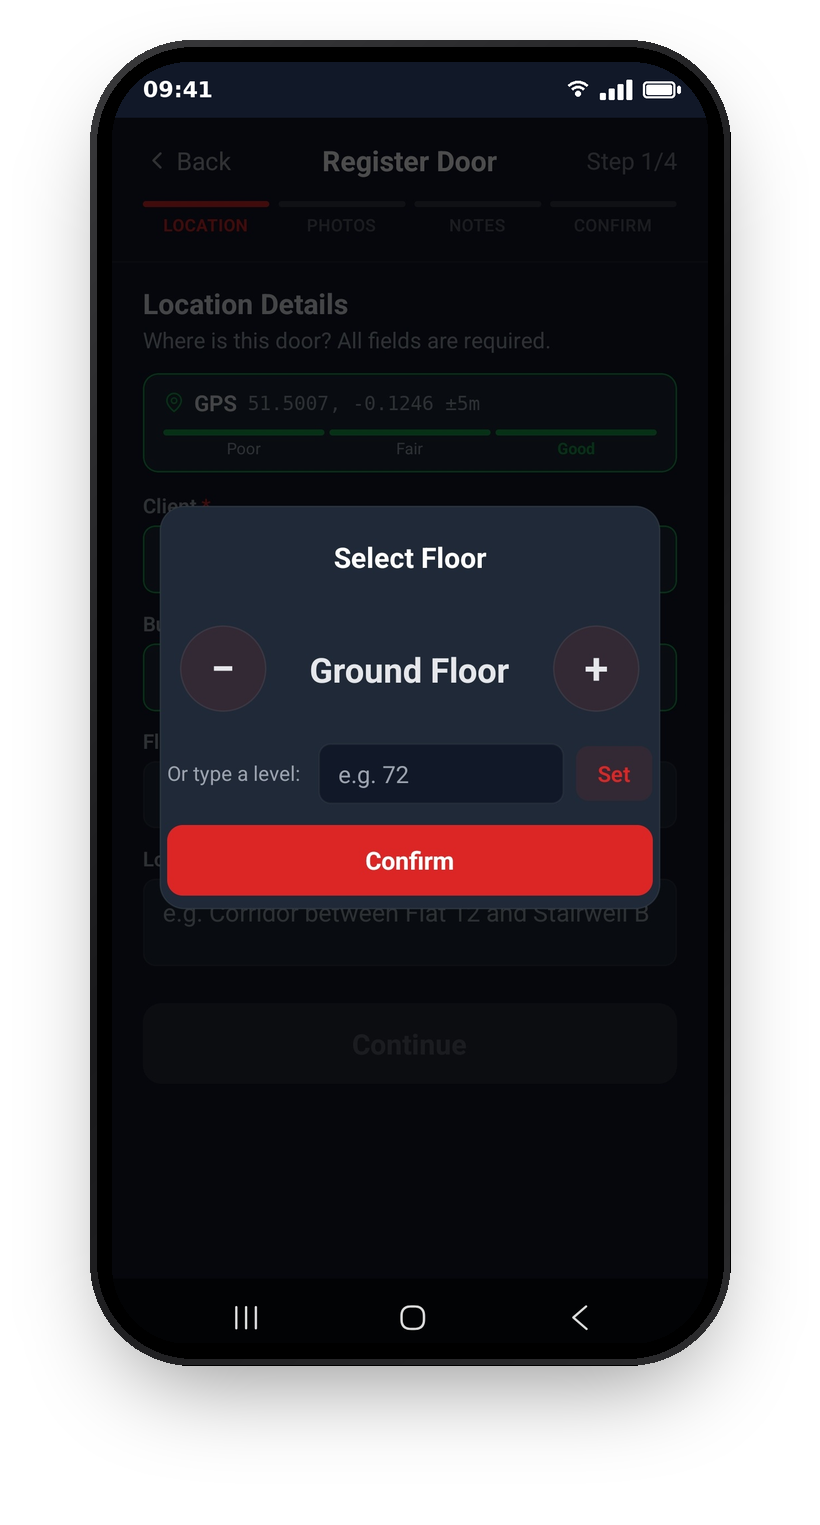
The Select Floor picker steps through every possible floor: Basement 20 up through Lower Ground and Ground Floor, then Level 1 to Level 100, topped by Roof Level. Tap the + and - buttons to step, or press and hold to move fast. For tall buildings there's a shortcut: type the level number into the Or type a level box (0 for ground, negative numbers for basements) and tap Set, then Confirm.
Two things worth knowing. The picker remembers the floor you last confirmed, so registering ten doors on Level 6 means picking the floor once and confirming it for the rest. And you can pick a floor that doesn't exist on the building yet - it's created automatically when the registration syncs, slotted into the right position in the building's floor order.
Step 2 - Photos
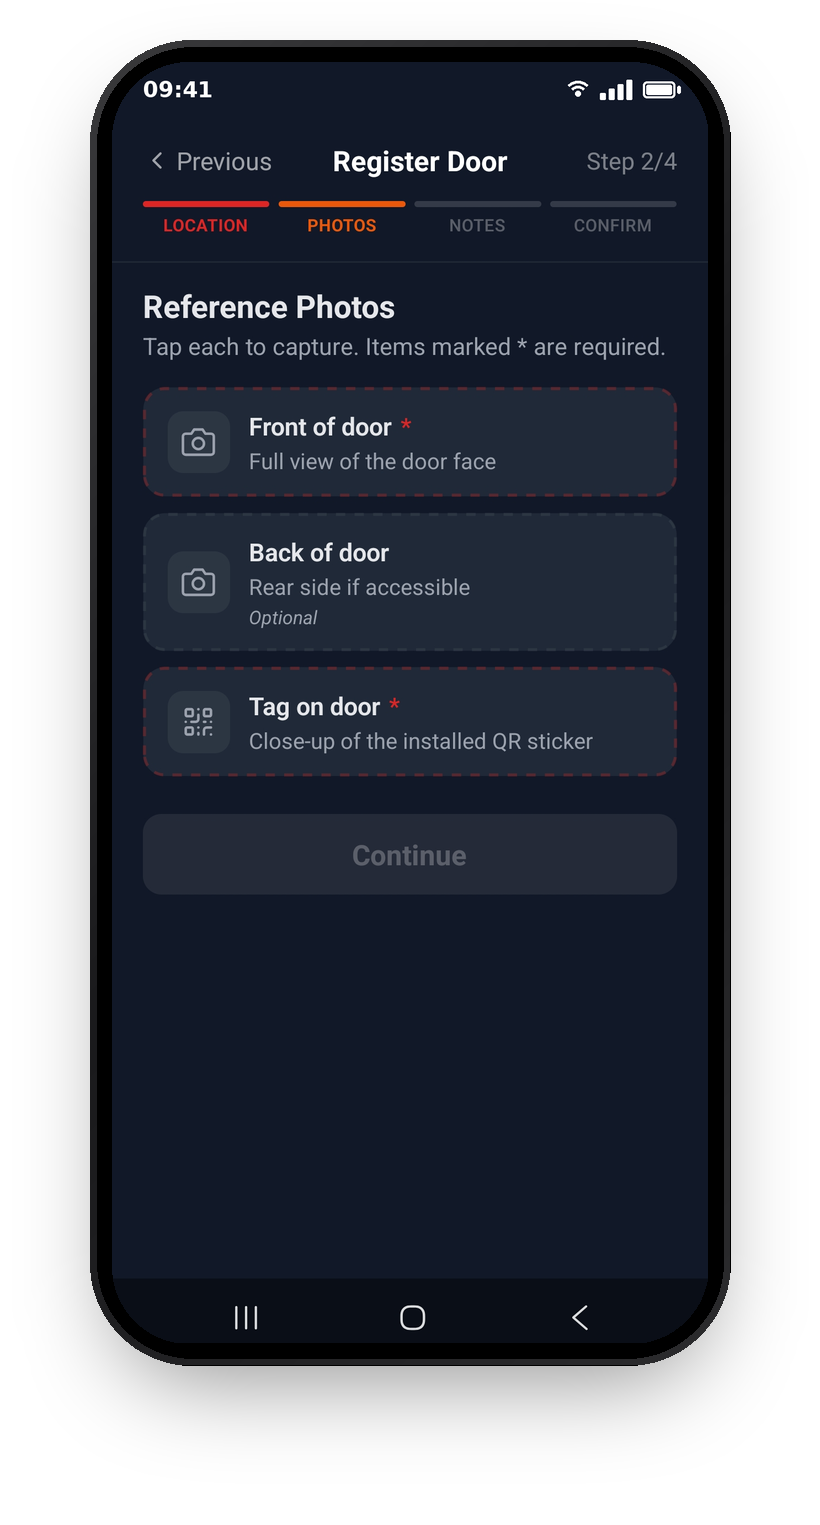
Three reference photos, captured by tapping each row: Front of door (a full view of the door face, required), Back of door (the rear side if accessible, optional), and Tag on door (a close-up of the installed QR sticker, required). The first capture asks for camera access if the app doesn't have it yet. Each row turns green once its photo is taken, with a thumbnail - tap again if you want to retake it. Continue unlocks once both required photos are in.
Step 3 - Notes
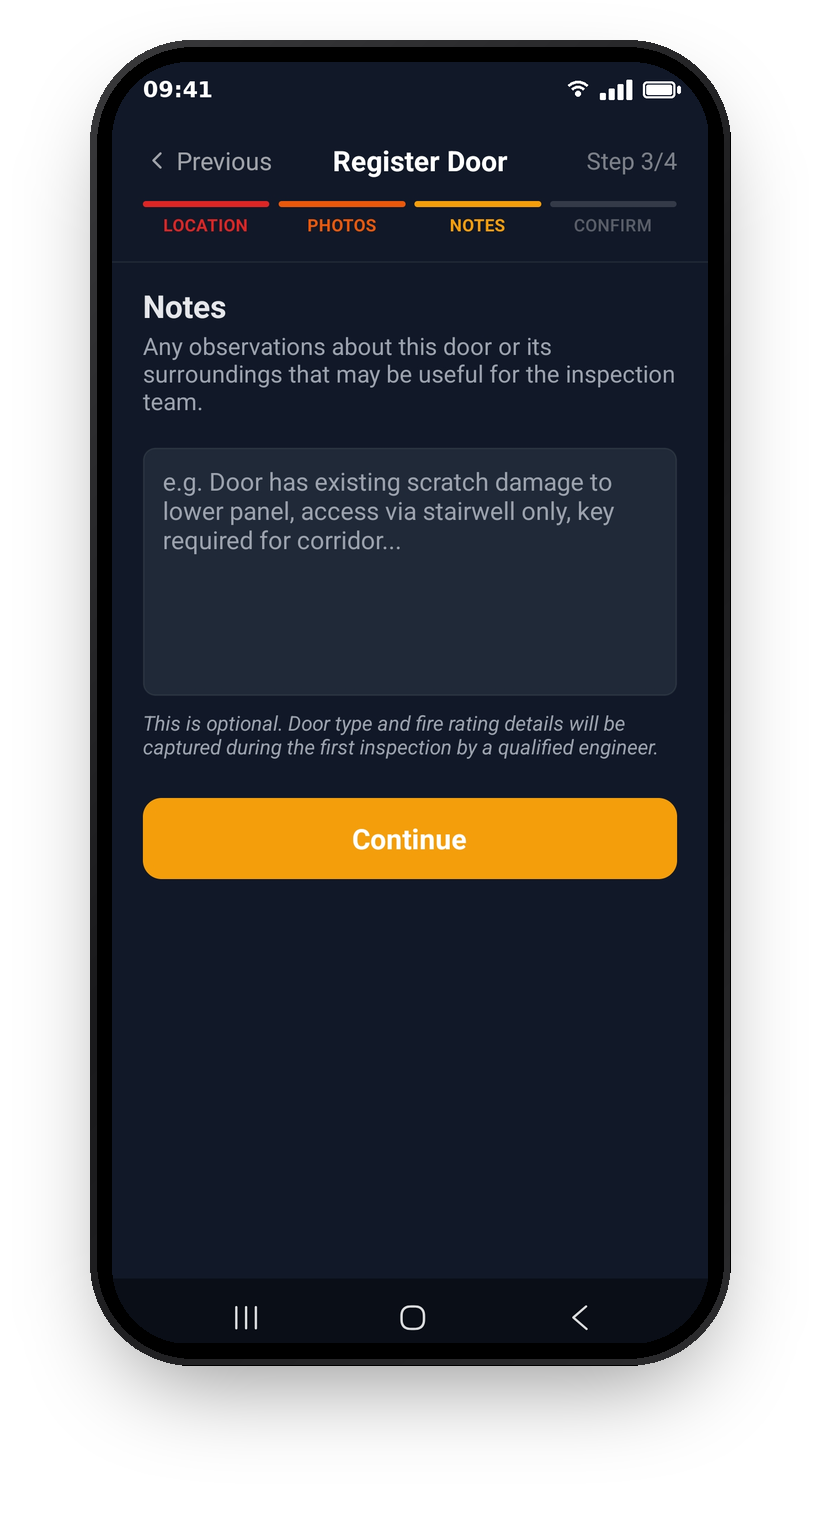
Notes are optional: anything about the door or its surroundings that the inspection team would find useful - existing damage, access quirks, keys required. Don't worry about the technical details here. Door type and fire rating are captured during the first inspection by a qualified engineer, not at registration.
Step 4 - Confirm and sign
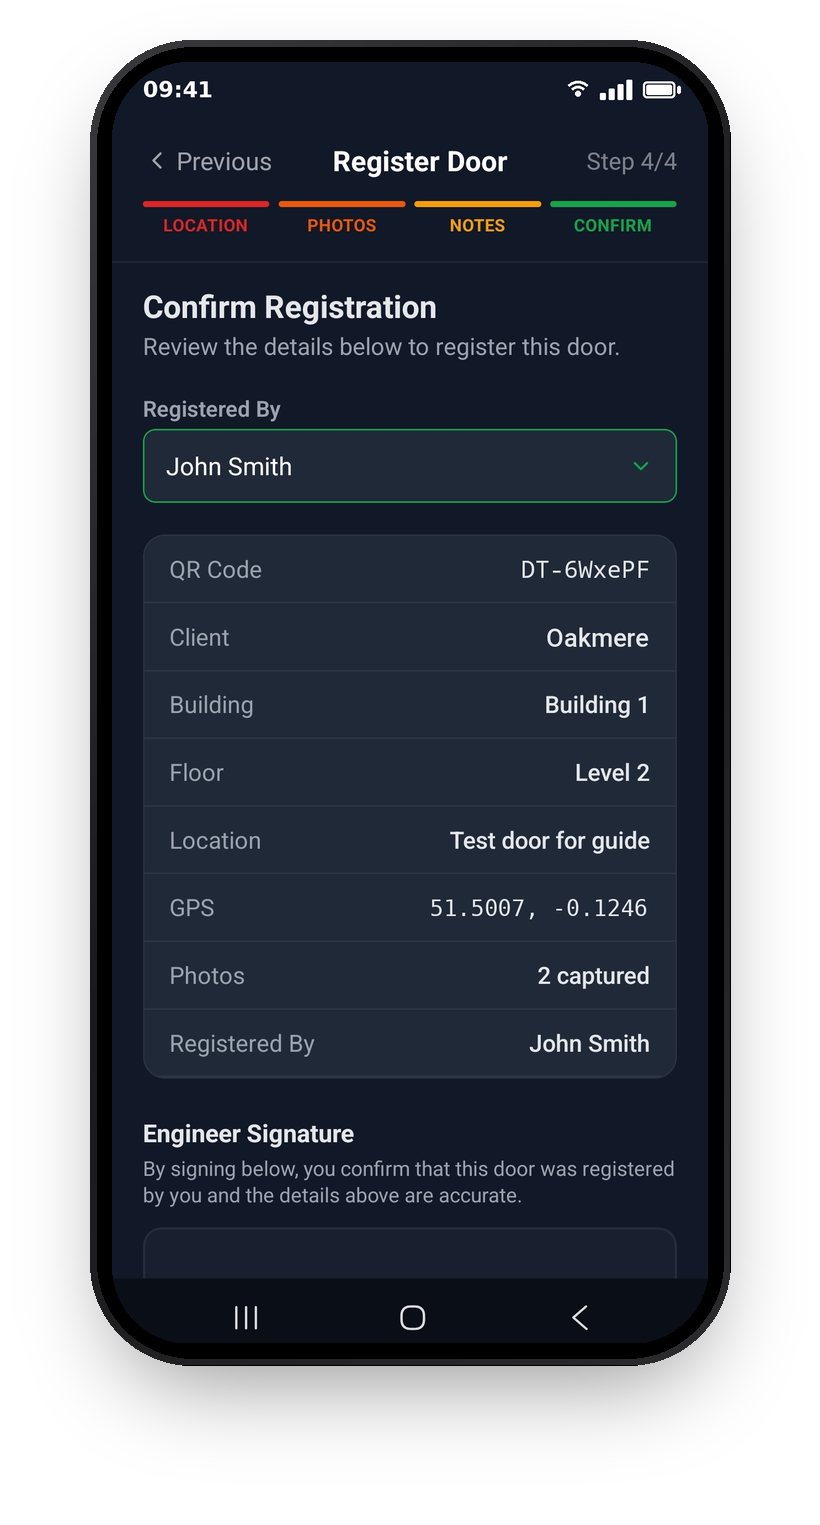
The final step shows Registered By and a summary of everything you've entered: the QR code, client, building, floor, location, GPS, photo count, and the name registering the door. If more than one authorised name is set up for your registrations, Registered By is a dropdown - pick the right name. Check the summary carefully before moving on: this is what goes on the door's record, and what everyone after you will rely on.
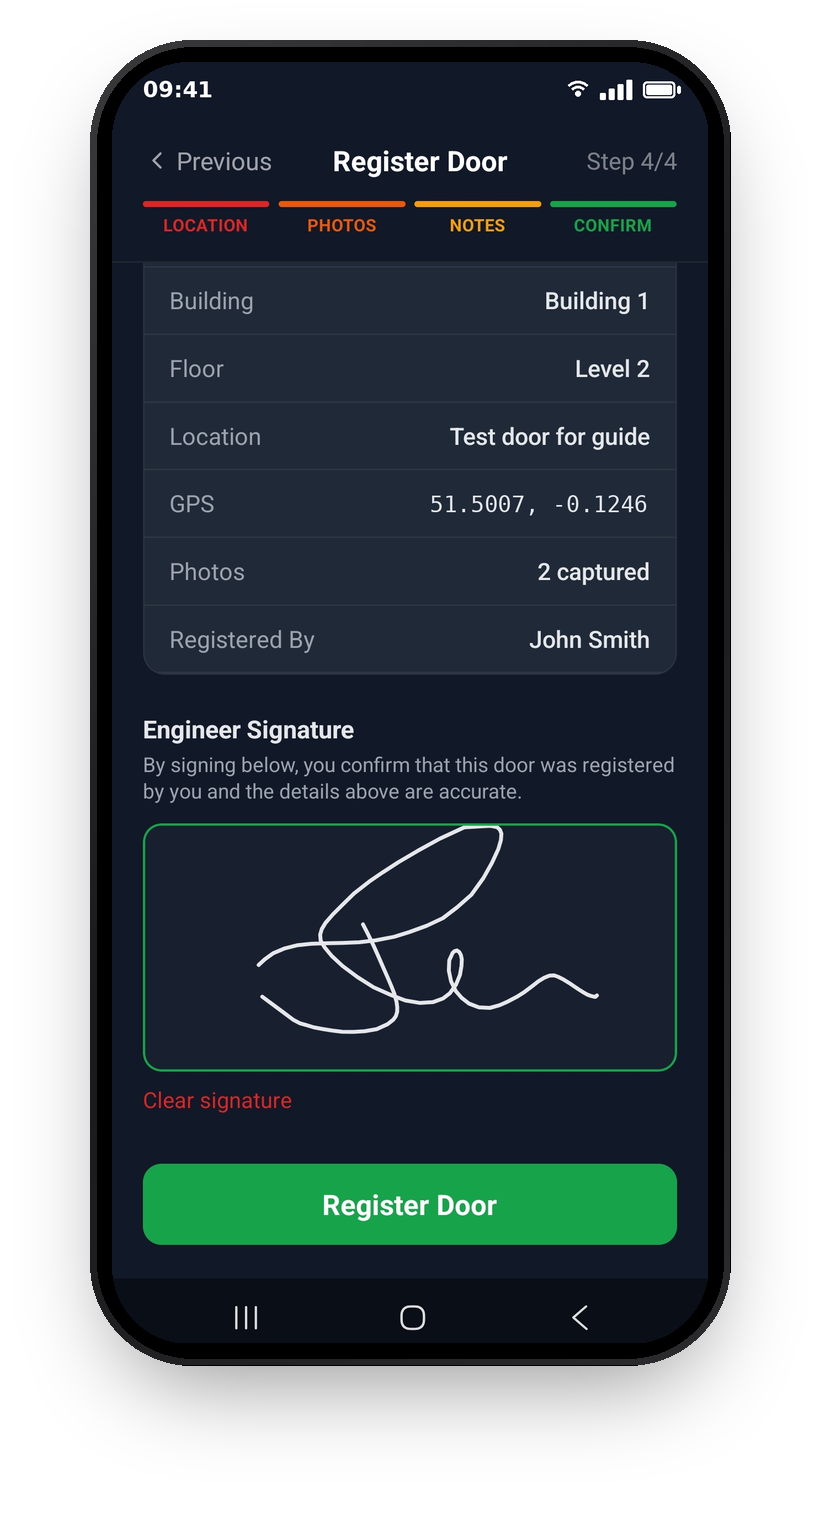
Below the summary, draw your signature in the Engineer Signature box. By signing you're confirming the door was registered by you and the details above are accurate - tap Clear signature if it needs a second attempt. That done, tap Register Door.
Important: Leaving the wizard part-way through discards the registration. The app warns you first - "Leave Registration?" - but there's no draft saved, so it's quickest to finish a registration in one go.
After you register
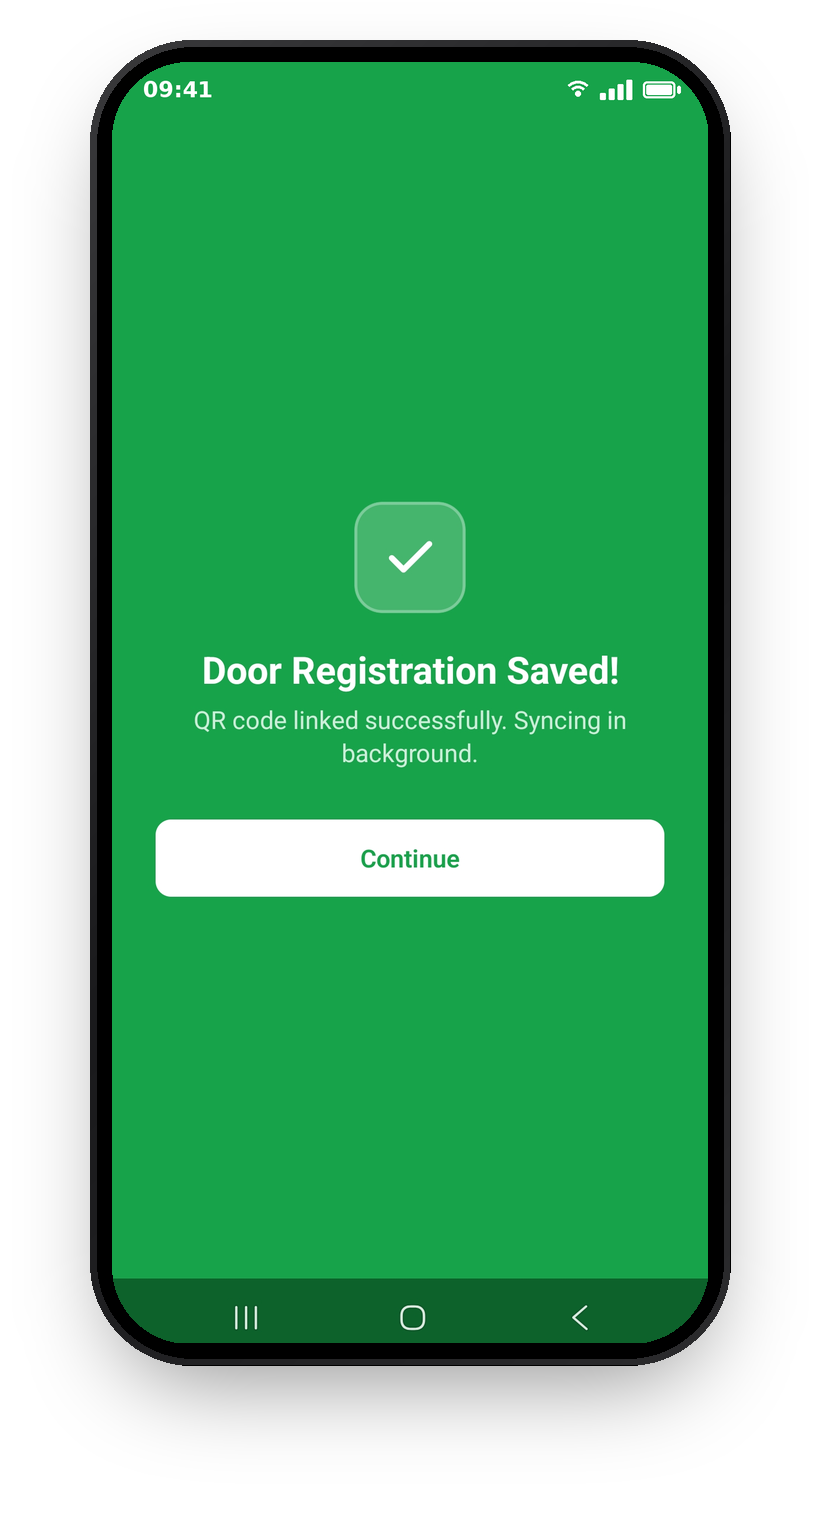
A green Door Registration Saved! screen confirms it. If you're connected you'll see "QR code linked successfully. Syncing in background" - the door appears on the system moments later. If you're offline it says "Saved to device. Will sync automatically when connected" and uploads itself next time you have signal, so you can keep working through a building with no reception.
Once synced, the door is live: it shows in the company's portal with a registration entry in its inspection history, and your photos and signature are stored as the registration evidence. The door sits as registered but not yet inspected - its first job is an initial inspection, which establishes its baseline condition, captures the technical details, and confirms its inspection schedule.
If something goes wrong
- Register greyed out with "Already registered" - the tag is already linked to a door. One tag, one door: if you're trying to replace a damaged tag on an existing door, that's a different flow - see Replacing a damaged QR tag.
- "This QR code is already registered to another door" - the tag was registered by someone else between your scan and your sync. Scan it again to see the door it now belongs to.
- The building or client isn't in the dropdown - you can only register doors into buildings you're linked to. Contact the company to check the building exists and your access covers it.
What's next
A newly registered door is waiting for its first inspection. The Running an initial inspection guide covers that first full inspection end to end.
Still can't find the answer?
Send us a message and we'll help. We respond within one working day.