Engineer App guides
Engineer App · Inspections
Completing remedial work
Last updated 17 Aug 2026
When an inspection finds defects on a door, the door stays flagged until the remedial work is done and recorded. This guide covers the post-remedial form: finding your scheduled remedial work, selecting which defects you'll fix on a visit, recording each fix with an after-repair photo, handling defects you can't fix, and signing off the report. It follows on from Logging defects, which covers how defects are raised in the first place.
Before you start
The remedial work must be scheduled to you before the app will let you start. Defects raised by an inspection begin as unscheduled: the company using DoorTRACE schedules the work in their portal, and only then does the remedial option unlock in the app. If you scan a door that has defects but no scheduled work, the app tells you: "This door has defects, but the remedial work hasn't been scheduled yet. It must be scheduled in the portal before it can be completed". If you think work should have been scheduled to you, speak to the company.
You'll also need camera access, because every fixed defect requires an after-repair photo. If you haven't granted it yet, the app asks the first time you tap to take a photo.
Where your remedial work appears
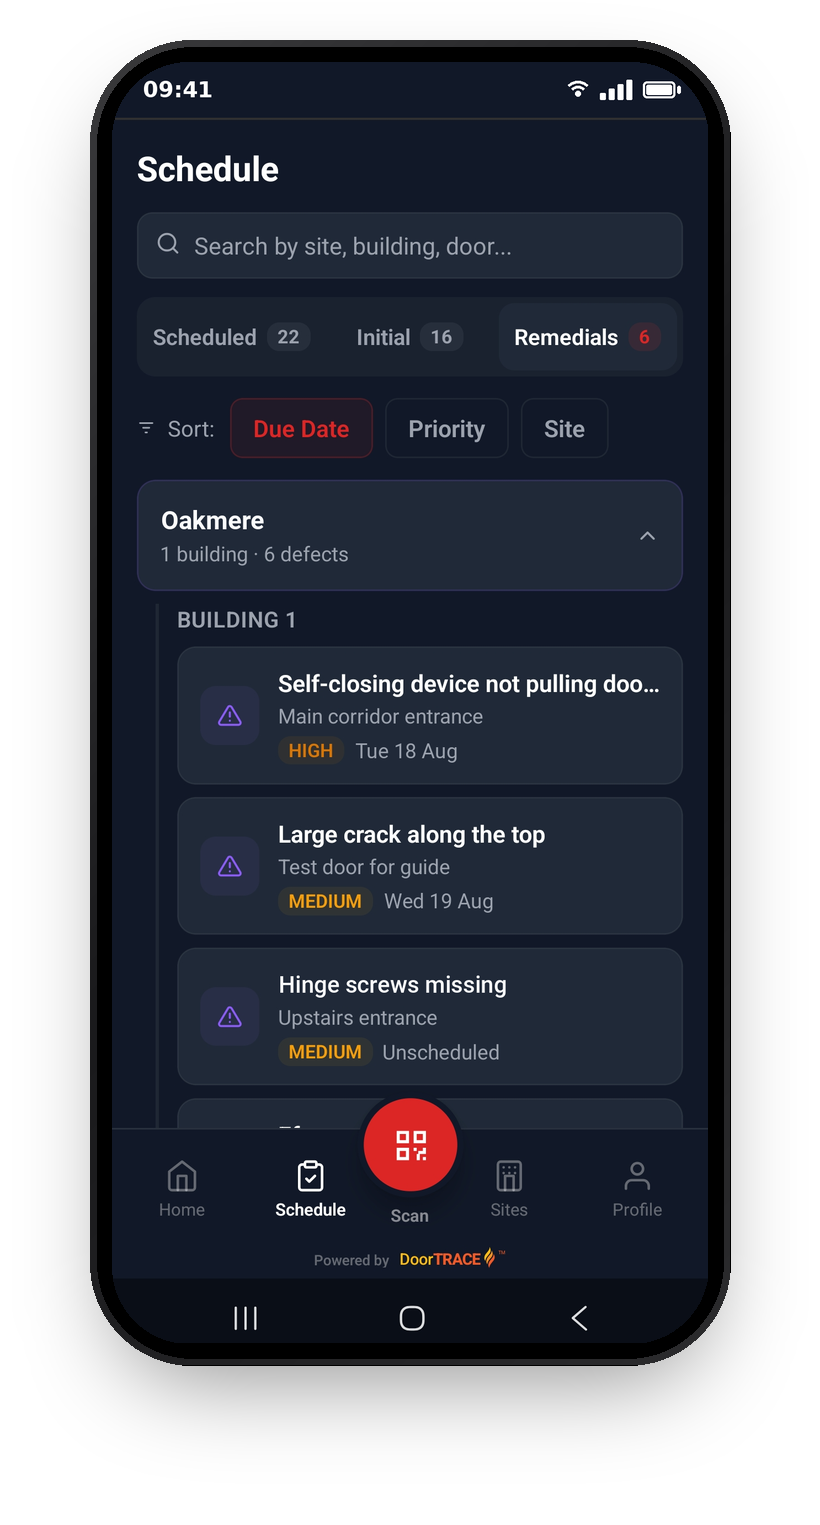
Open the Schedule tab and switch to Remedials. Each card shows the defect, the door location, a priority badge (Critical, High, Medium or Low), and when the work is booked for. Work without a booked date shows as Unscheduled. Anything past its date shows Overdue. Cards are grouped by site and building, and you can sort by Due Date, Priority or Site. This list is your work list, but you don't start the work from here: remedial work always starts at the door, by scanning its QR tag.
Starting at the door
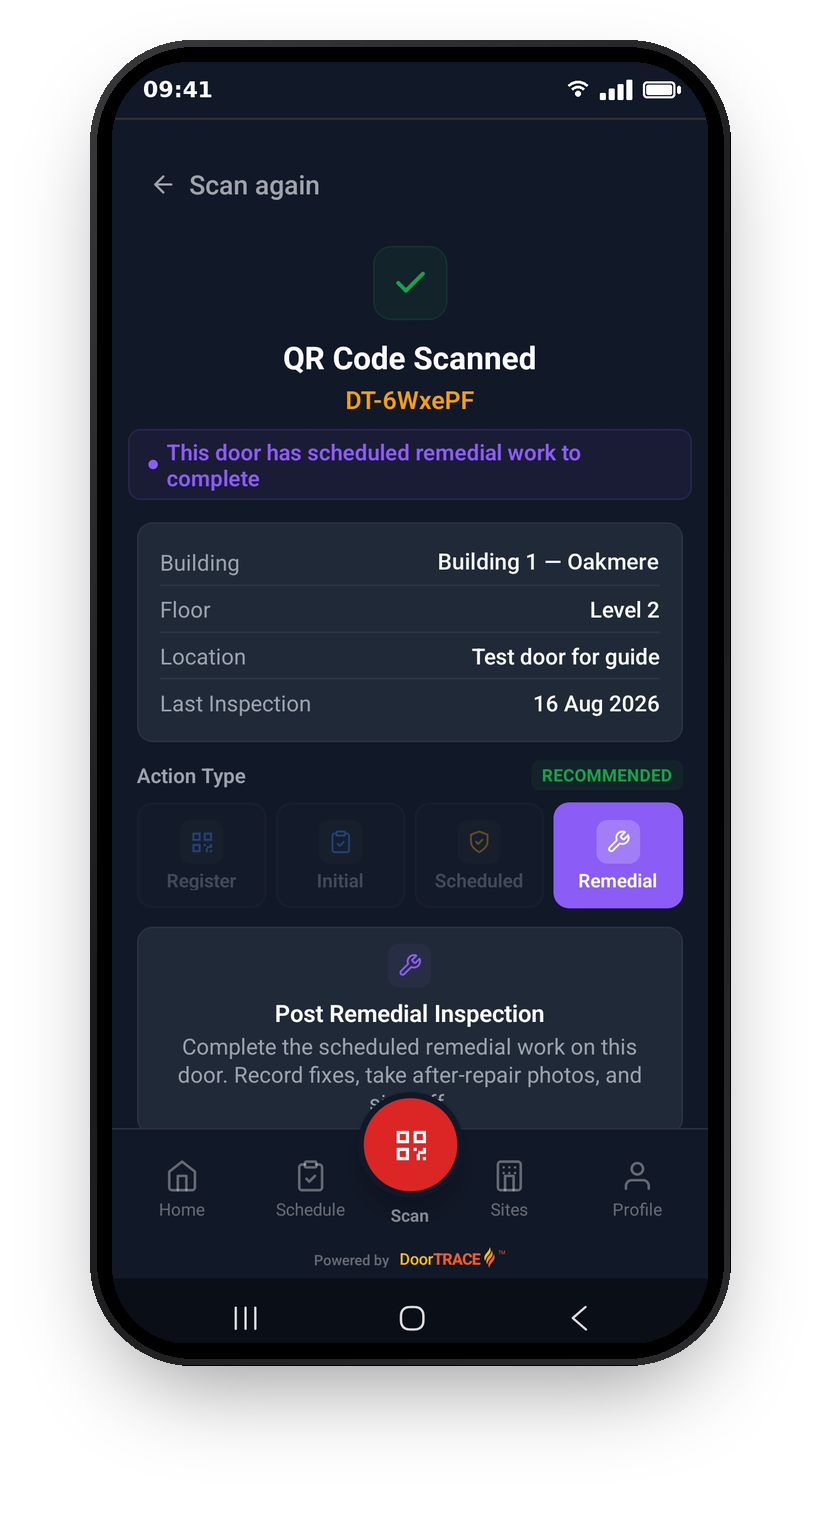
Scan the door's QR tag (or type the code manually) as usual. When the door has scheduled remedial work, the app recommends Remedial as the action type and shows the reason: "This door has scheduled remedial work to complete". The description reads "Complete the scheduled remedial work on this door. Record fixes, take after-repair photos, and sign off." Tap Start Post Remedial Inspection to begin. If the Remedial option is greyed out, tap it to see why: either the door has no open defects, or the work hasn't been scheduled in the portal yet.
Choosing which defects to fix
The first step, Open Defects, lists every defect on the door. Each card shows the priority, the category, the defect description, the date it was raised and the inspection reference. Defects scheduled to you carry a green Scheduled badge and can be ticked; you can pick them individually or use Select all. You don't have to fix everything in one visit: select the ones you'll address now and return for the rest later. Defects that haven't been scheduled to you appear greyed out with a Not scheduled badge and the note "Not authorised to fix - speak with your FM to have this scheduled to you." When you've made your selection, tap Begin Remedial Work.
Recording a fix
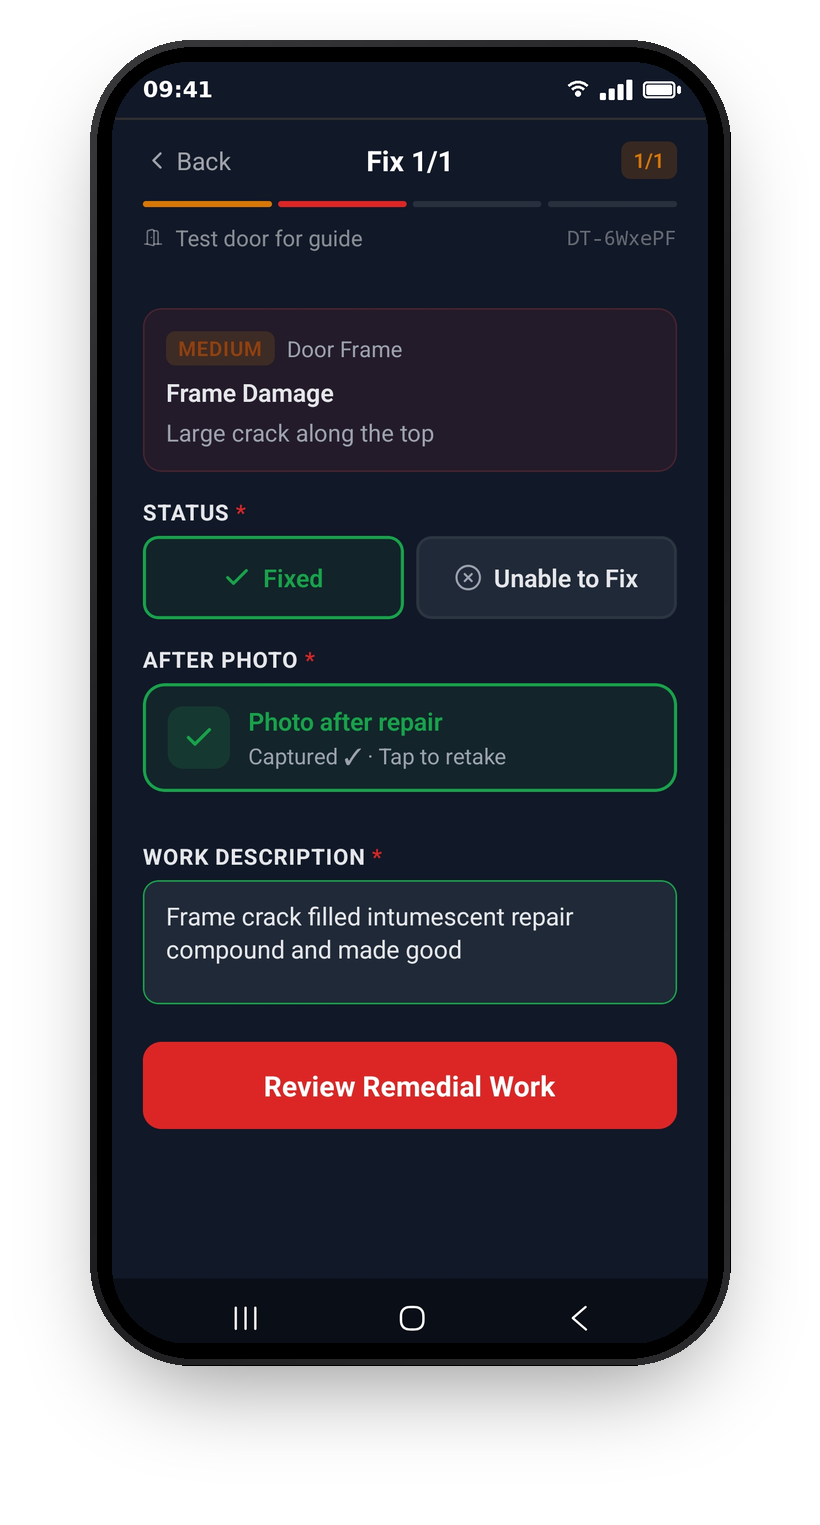
You work through your selected defects one at a time, with the header showing your progress (Fix 1/2, Fix 2/2 and so on). For each defect, choose a Status: Fixed or Unable to Fix. Choosing Fixed reveals two required fields: After Photo, where you tap Photo after repair to photograph the completed fix (tap again to retake), and Work Description, where you describe the work carried out. Both must be filled in before you can move on. Tap Continue to go to the next defect, and Review Remedial Work after the last one.
If you can't fix a defect
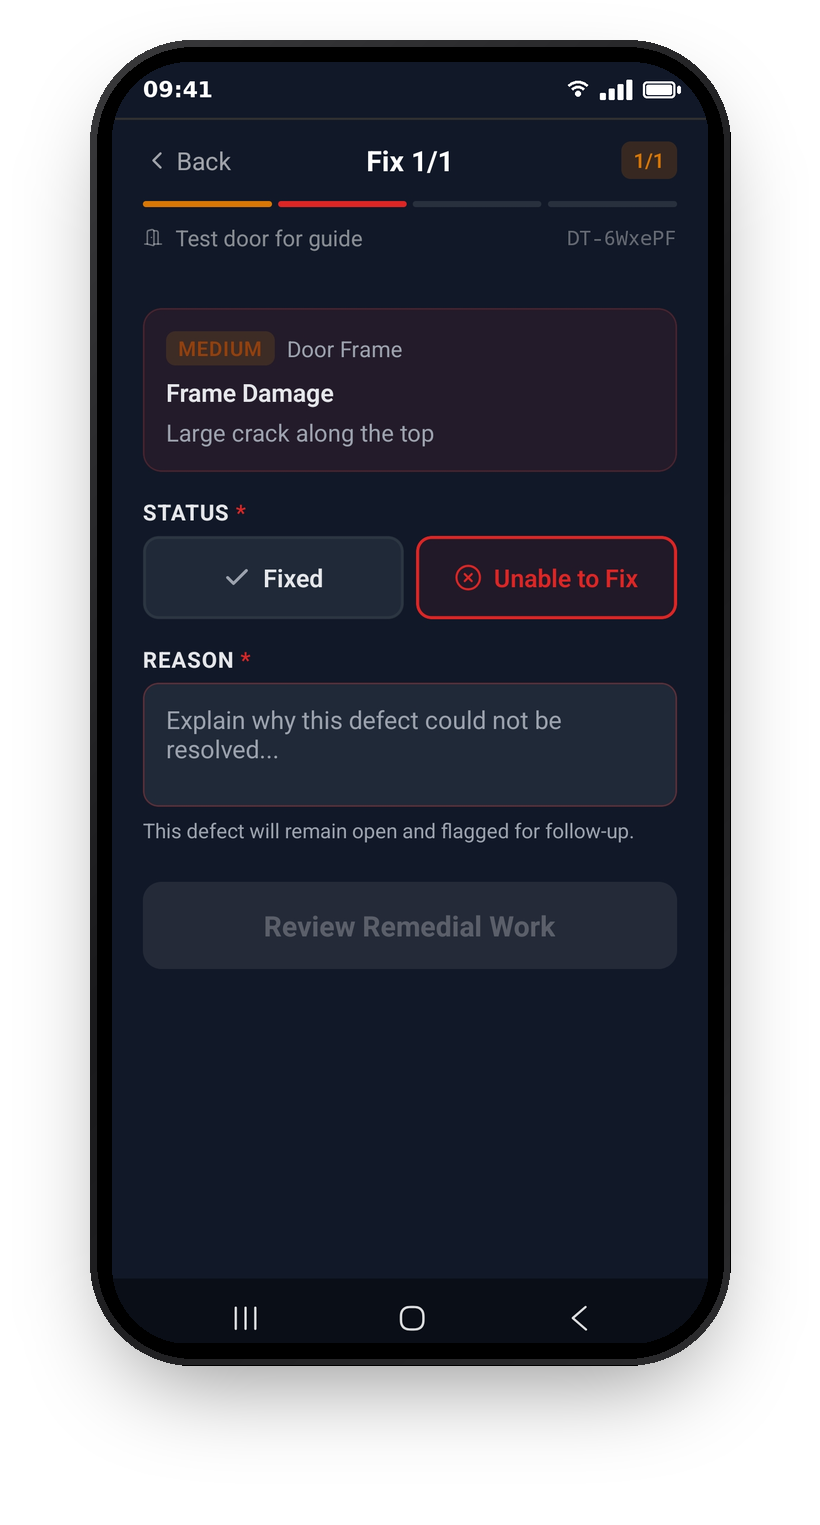
Sometimes a fix isn't possible on the day: a part needs ordering, the damage is worse than reported, or the door needs replacing entirely. Choose Unable to Fix and explain why in the required Reason field. As the app notes, "This defect will remain open and flagged for follow-up." Your reason is recorded against the defect for the company to see, so be specific about what's needed: it's what they'll use to arrange the next steps.
Review
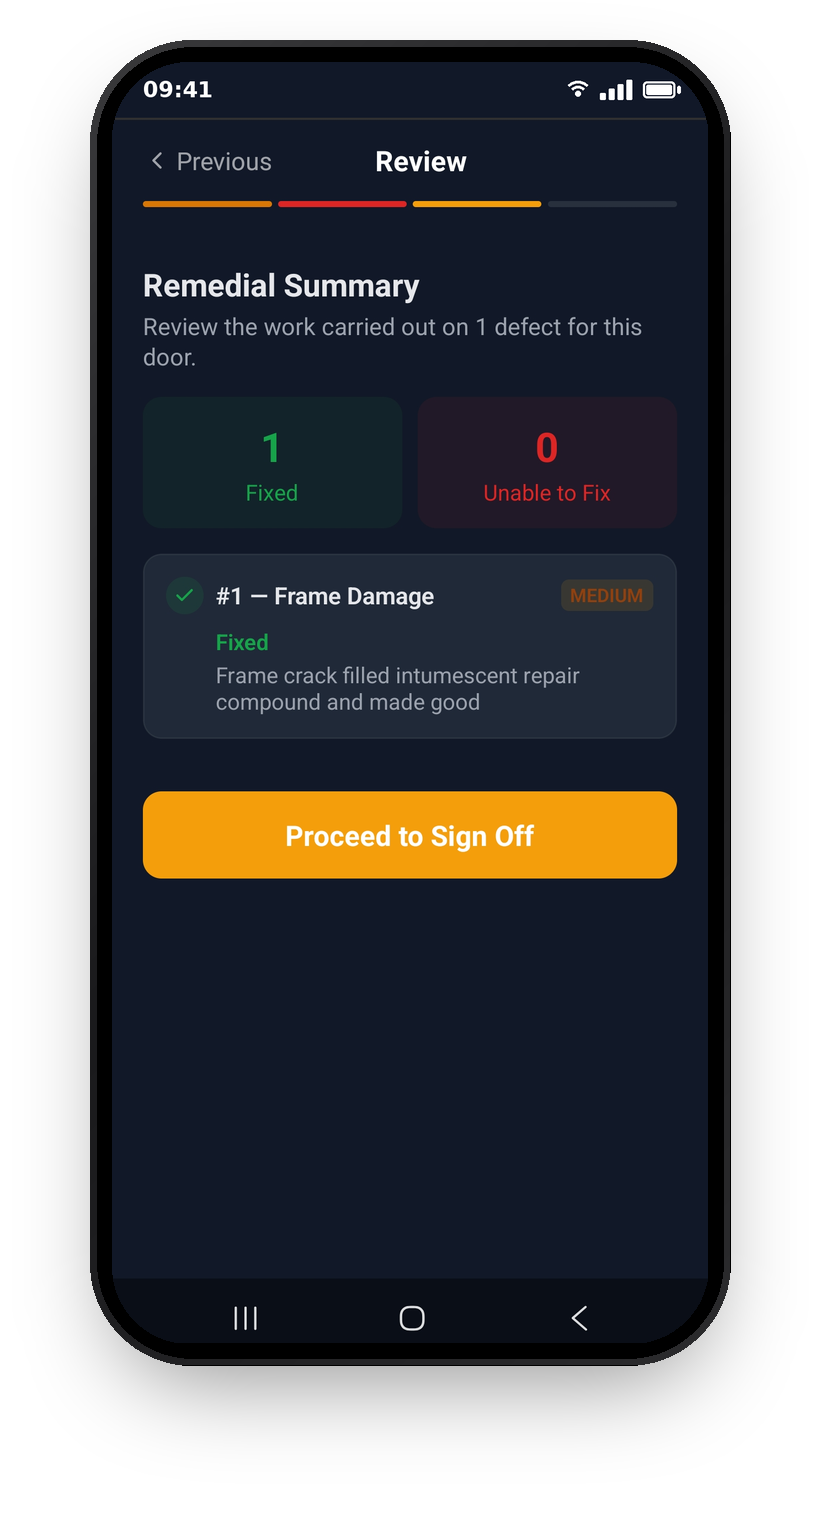
The Review step shows a Remedial Summary: a count of defects marked Fixed and Unable to Fix, then each defect with its status and the description or reason you gave. Check everything reads correctly. You can go back with Previous to change any fix before it's submitted. When you're happy, tap Proceed to Sign Off.
Sign off and submit
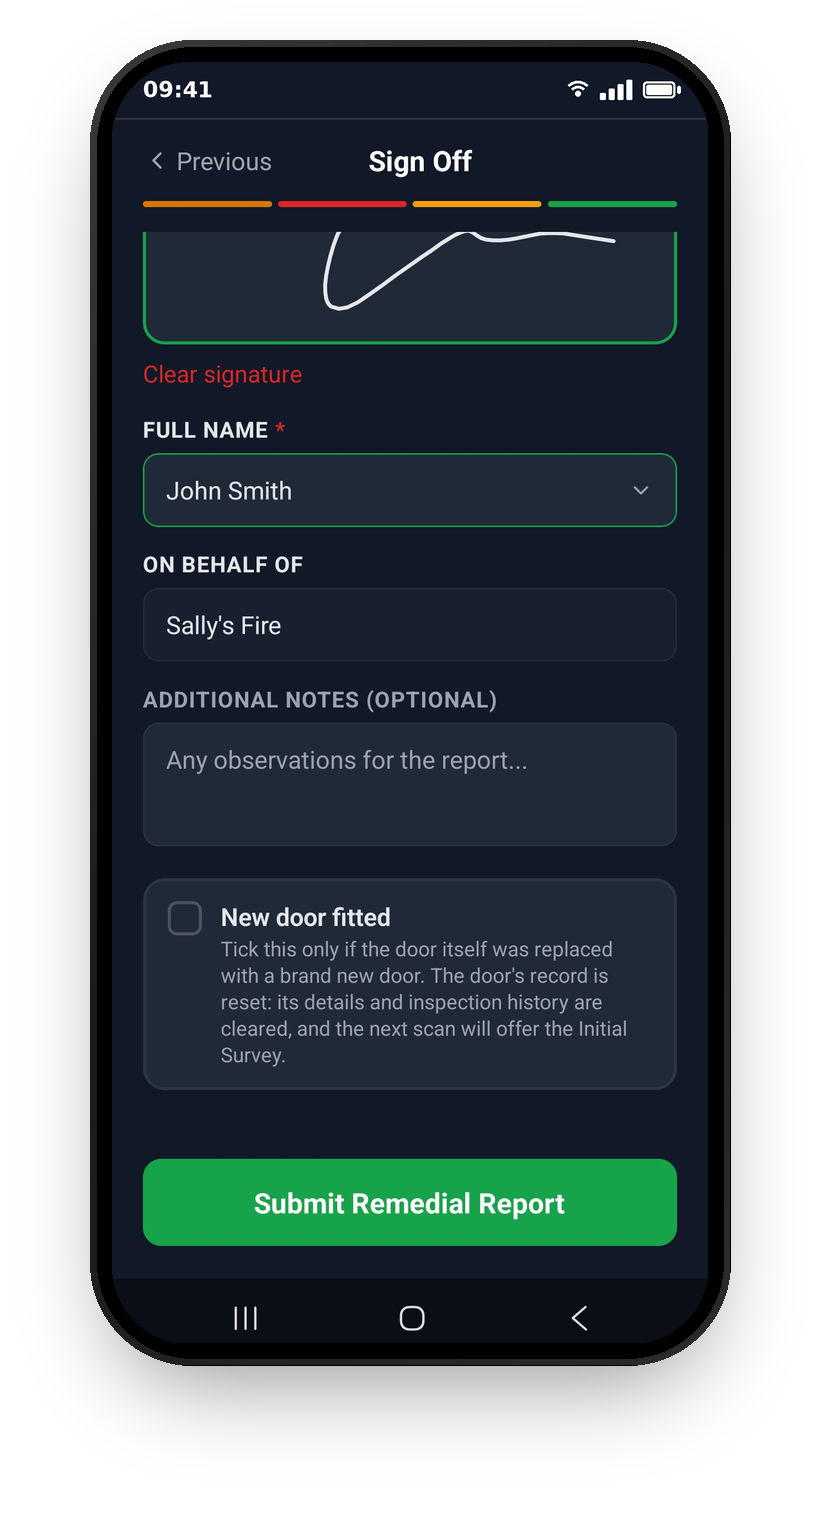
On the Sign Off step, draw your signature in the pad, then pick the signatory from the Full Name list. On Behalf Of is filled in automatically with your company. You can add anything else worth noting in Additional Notes. By signing, you confirm the remedial work described has been carried out and the results recorded are accurate. Tap Submit Remedial Report to finish.
Important: Tick New door fitted only if the door itself was replaced with a brand new door during the work. This resets the door's record: its details and inspection history are cleared, and the next scan of its tag offers the Initial Survey so the new door can be surveyed from scratch.
If you need to leave partway through, the app warns you first: any progress on the report is lost if you leave before submitting.
After you submit
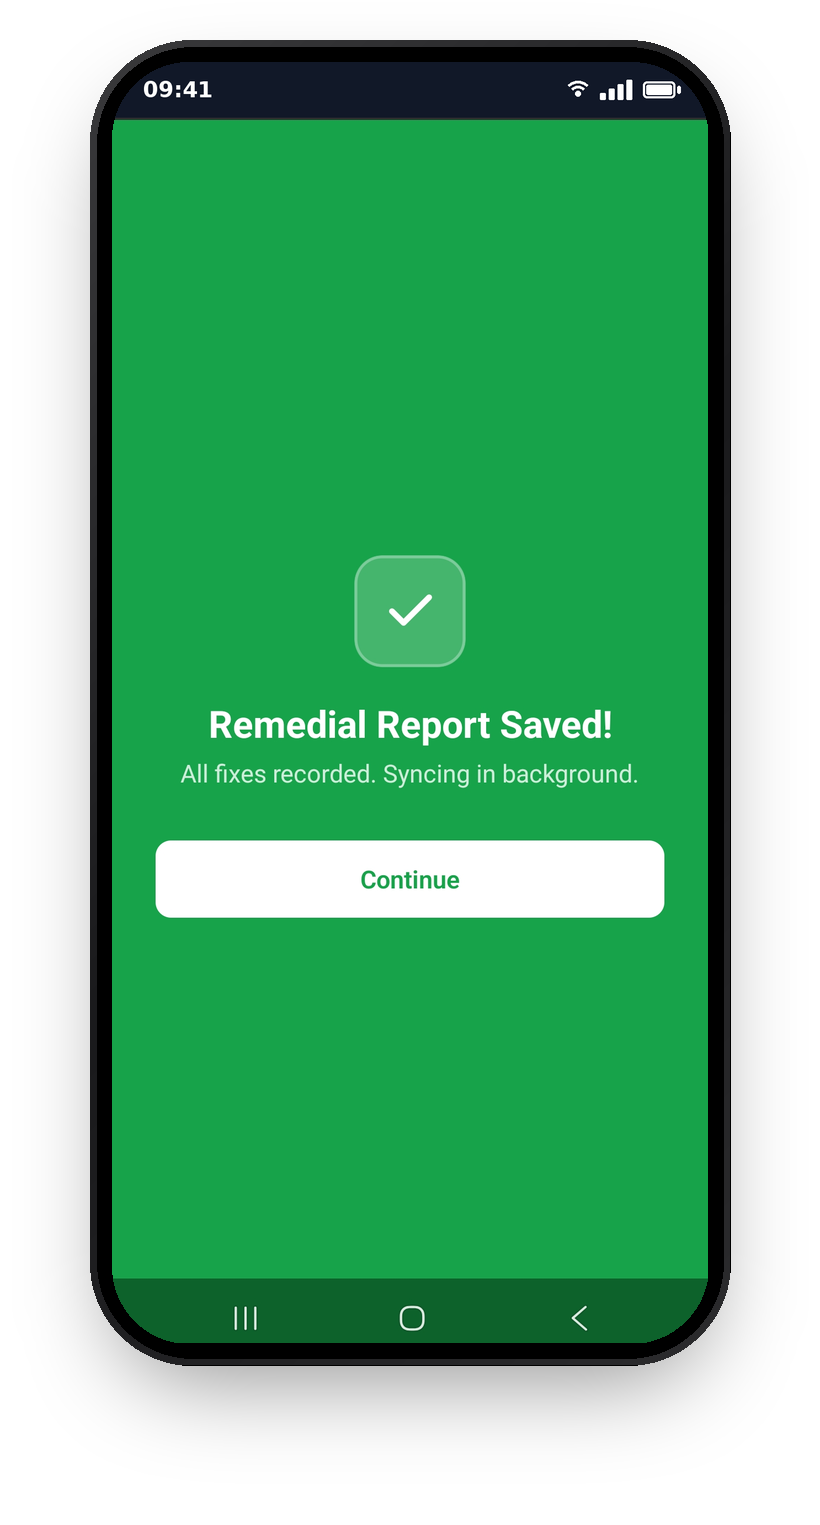
You'll see Remedial Report Saved! straight away. The report is saved to your device first and uploads in the background; if you're offline it waits in your sync queue and sends automatically when you're connected, so poor signal on site never loses your work. When it syncs, each fixed defect is marked completed with your work description, your after-repair photo and your signature attached. Defects you couldn't fix stay open with your reason recorded. A post-remedial inspection is also added to the door's history, so the visit forms part of the door's permanent record.
Once every defect on a door is resolved, the door returns to compliant. The company may then verify each completed fix on their side; if a fix fails verification, that defect is reopened for further work.
Important: Only a completed post-remedial form resolves a defect. A later routine inspection that passes does not clear existing defects - the door stays flagged as requiring action until the remedial work is recorded through this flow.
What's next
That completes the inspection guides: registering, inspecting, logging defects and closing them out again. Read Logging defects if you'd like a refresher on how defects are raised and prioritised in the first place.
Still can't find the answer?
Send us a message and we'll help. We respond within one working day.